For Purchasing & Shipping Information To Many Of The Sculptures/Statues Shown On This Site Please Click On The Photo That Has Green Lettering And You Will Be Re-Directed To The Mascot Shop/Snarlingcrow Sculpture Studio - Shop Online Catalogue.

For all other sculptures/statues/products please follow the link under the photo.

Showing posts with label 3d models. Show all posts

Wednesday, October 13, 2010

Mold Making Instruction: Creating A Mold Off A Portion Of A Yellow Jacket Mascot Sculpture


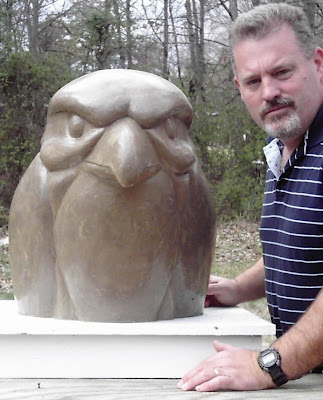
I was fabricating a one-of-a-kind yellow jacket sculpture a couple of months ago when I decided that I wanted a mold for the head which I had spent many,many, many hours working on. Since time and money was tight for this project a full mold was out of the question but because I really liked how the head had turned out I figured that if another yellow jacket mascot was needed, my having a head mold of this one would put me way ahead on building another.So what I did was release the entire head and about two inches below where the head joined the body. I then applied the silicone rubber, detail coat first followed by a thickened paste which was smoothed out. I then applied the fiberglass for a two part mold for waxes, resins, or plaster.

Once the mold was cleaned up and all the bolts drilled and fastened, everything was broken down and pulled away from the original and put away for future use. Once I thoroughly cleaned the head area,I went back to finishing the mascot sculpture like before.

The final mascot sculpture can be seen above in my banner and at Snarlingcrow Studios website.

Look for complete project progression photos of this mascot sculpture at a later date.

Thursday, February 25, 2010

Original One-of-a-Kind Mobile Sculptures


"Hog-O-Taur" Gargoyle Mobile
4 1/2" wide x 4" high x 5" deep


"Toucan" Whimsical Mobile
8 1/2" long x 4 1/2" high x 3" deep

Thursday, January 21, 2010

Saturday, November 7, 2009

Gargoyles Here!!! Gargoyles There!!! Gargoyle Art Sculpture Everywhere!!!

One of my gargoyle's standing by his victim. LOL

Gargoyles hanging from buildings everywhere!!!

Without a doubt, one of my favorite art forms


Medieval Torture Sculpture + Evil Spirits = A Unique Garden Decor

It's an amazing facet of creative thinking where we begin with an idea that eventually materializes in a completely different way than we had originally imagined. I had started a sculpture where I wanted to explore the facial traumas that professional fighters endure for their chosen sport.

As I got further into the work however, I suddenly, and unexpectedly, changed direction and decided to parallel how politics, religion, the media, etc, etc, ad nauseum, attempts to control our thinking, day in and day out, by showing us the images and the stories that they think we should see or hear. What better way to expand on that idea than showing a device securely strapped over a head, which severely restricts our ability to hear and see, and that effectively silences our freedom of speech?
Even though I had never sculpted anything similar to this before, doing this garden art statuary bust was strangely cathartic for me. You may or may not agree with my thinking on this but you have to admit that mounting a casting of this head in your flower bed would forever protect you from evil spirits and create a very special garden decor aura all your own.

You may even attract a little attention from your neighbors in the process.

Monday, October 26, 2009

Mold Making For A Gargoyle Creature


I had received several requests for a gargoyle creature for the garden so I sculpted this figure out of sculpting wax, painted it to see what I had, and as shown above, began the process of creating a two part silicone mold and a fabricated fiberglass mother mold (not shown) for support. Here you can see that I have cleanly established the seam line by using Kleen Klay and wooden blocks for support.


In the photo above, I have applied the initial detail coat of silicone and made certain that all areas have been covered including a predetermined area surrounding the sculpture so that you will have a lip of rubber that aids in the proper alignment of the two halves. Two additional thicker coats of rubber will be applied to give you a strong enough mold for many castings.


Here you have the cured rubber mold lying in the fiberglass mother mold flipped over with the back part of the sculpture now facing up, ready to repeat the above process. When this has been completed holes will be drilled through the fiberglass and rubber lip and joined, now ready for casting.

Wednesday, March 25, 2009

Raptor Sculpture

A stylized form with flowing lines. Flame polished clay model. To see the finished sculpture click photo.
©2009/Keith Simerson